
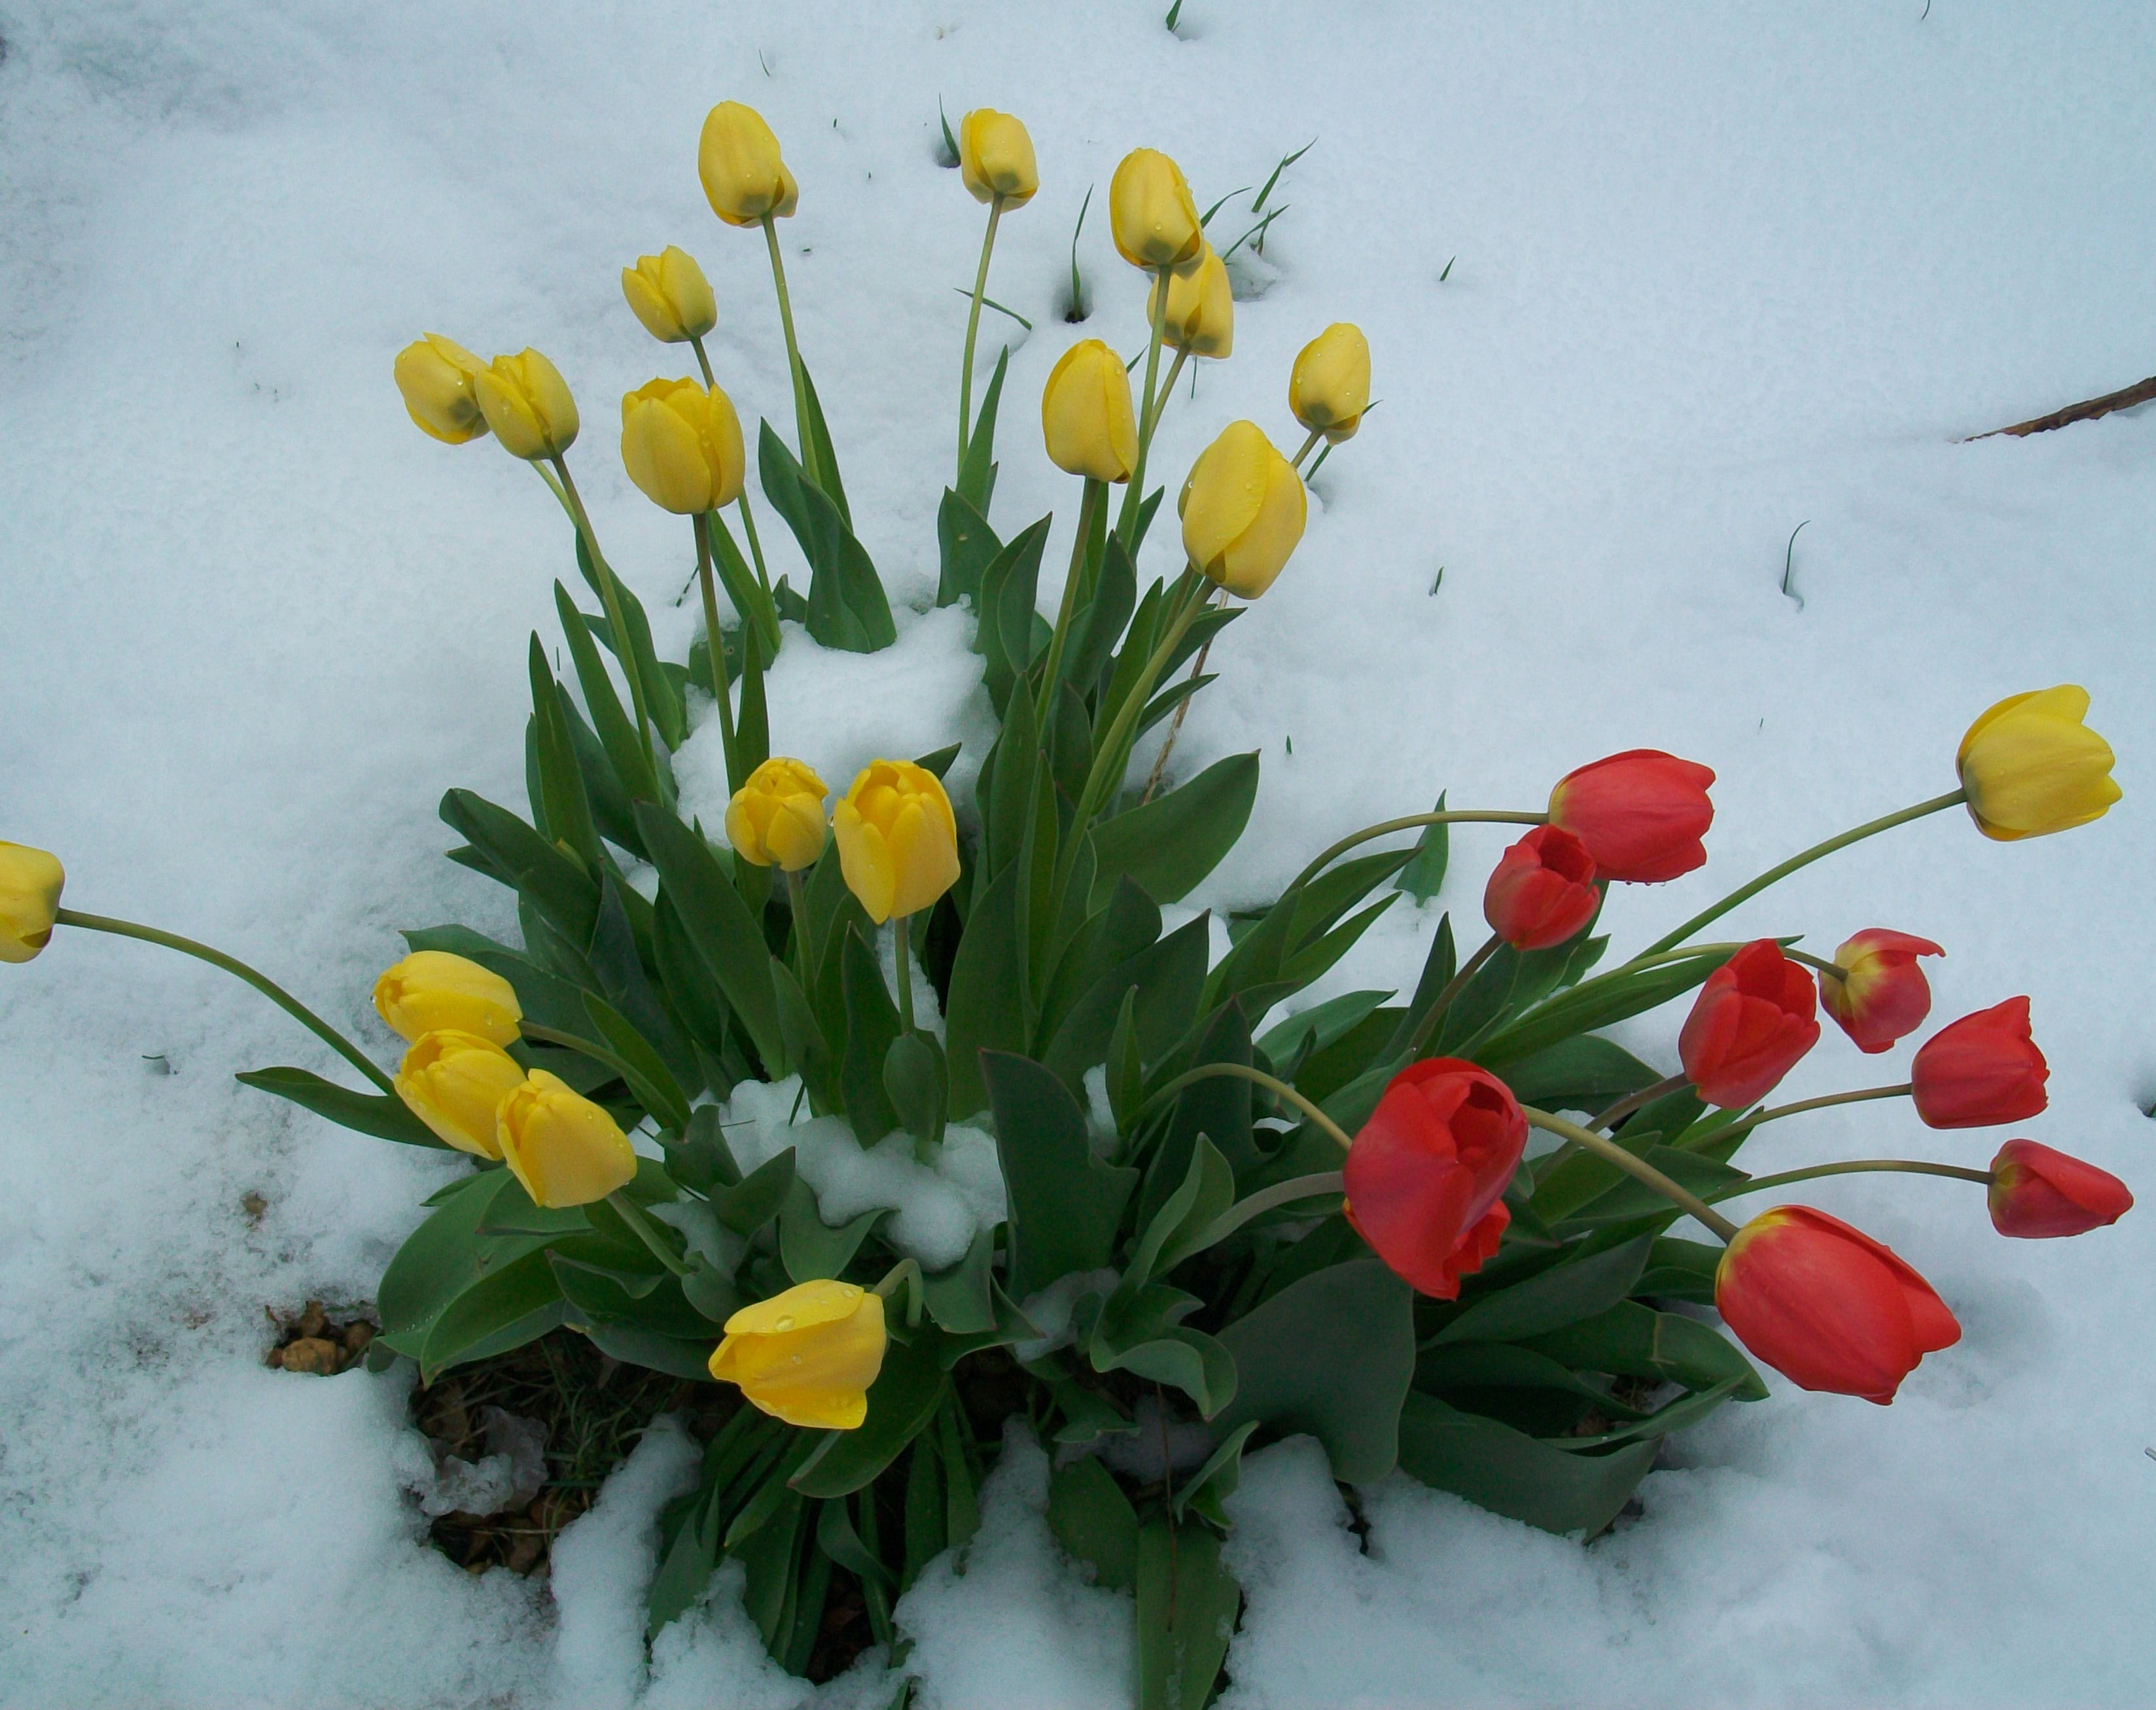
If you think that autumn is the time to stop gardening think again! Bulb-planting time!
Fall-planted bulbs produce the first blooms of next year’s season. The bulbs spend the winter making roots and come up early in the spring.
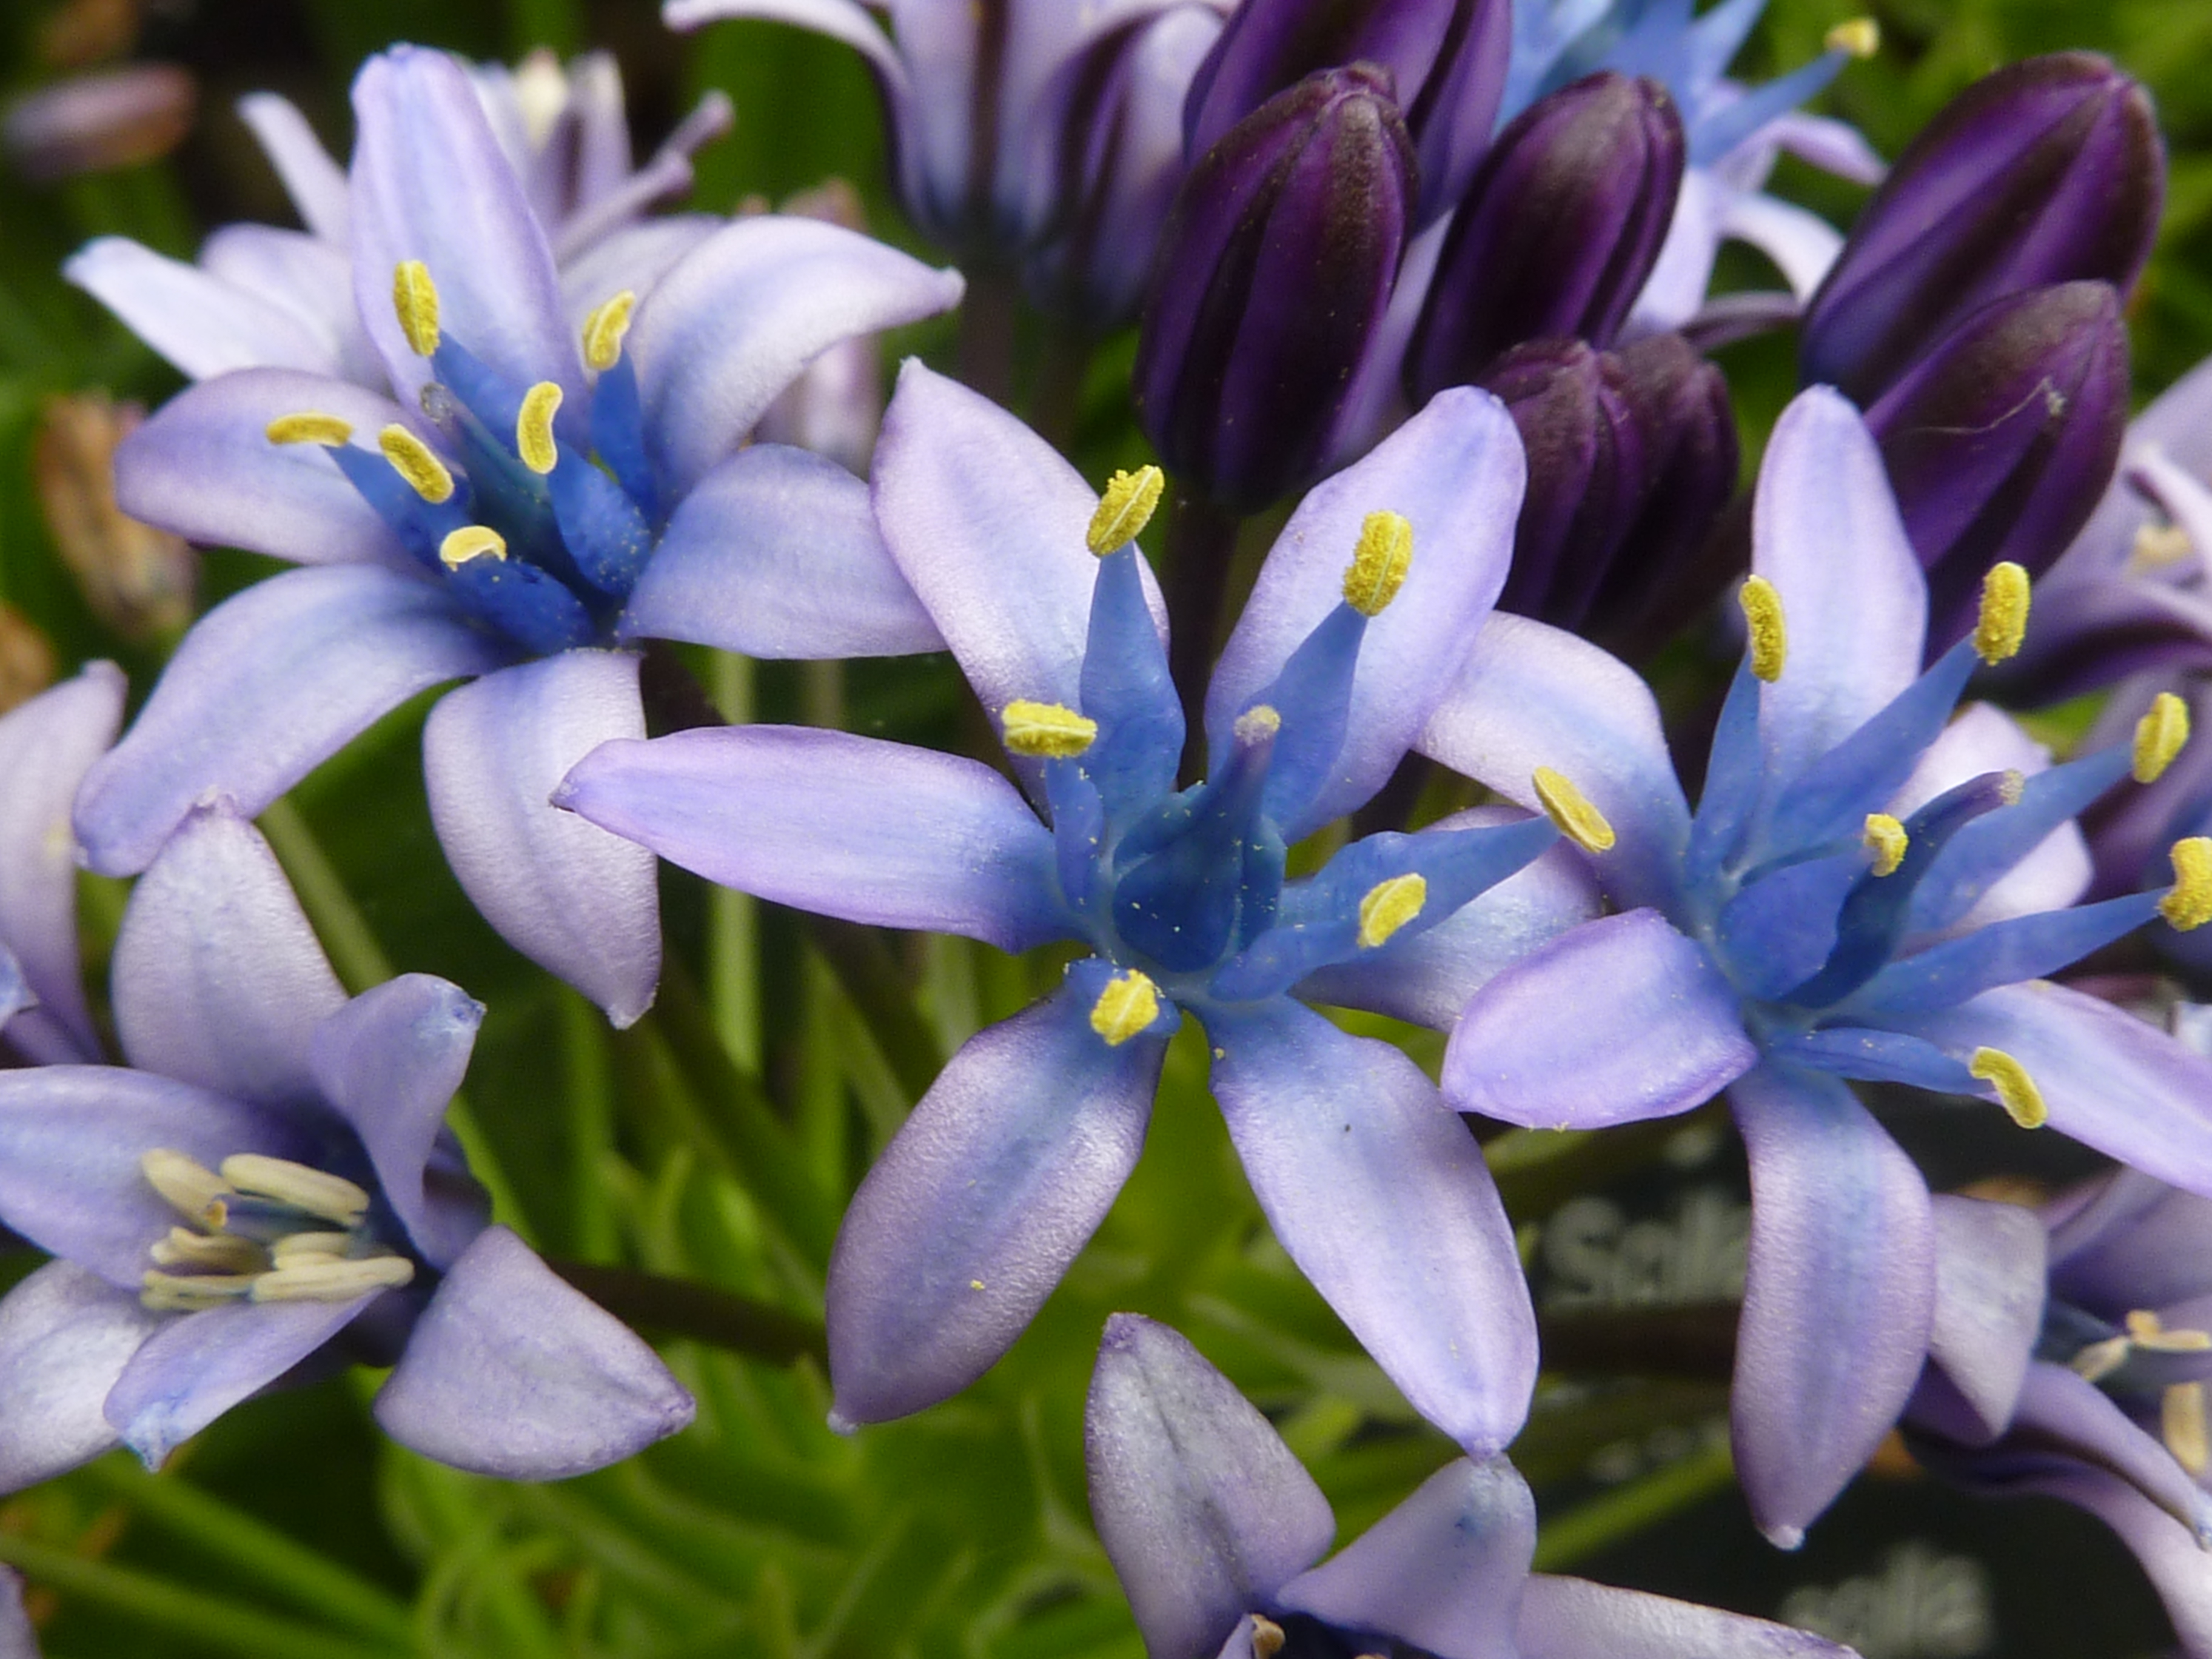
Magnus Manske – Own work
Taken in the Cambridge University Botanic Garden
Tips for Planting Bulbs
- In the fall, you’ll find bulbs to purchase everywhere! Make sure you buy your bulbs from a reputable nursery, garden center, or catalog. Second-rate bulbs product second-rate flowers or don’t sprout at all.
- Plant anytime before the ground freezes. In the lower South, where you may not have hard freeze, early November is a good time to plant.
- See the chart below for type of bulbs by hardiness zone. In the warmer South, note that some bulbs need to be treated as annuals instead of perennials (e.g., tulips); they’ll bloom once and then they’re done. Still, they are a beautiful sight to behold and worth it! Other bulbs (e.g., daffodils) will act as perennials and come up year after year.
- For inspiration, visit our Flower Guides which include many common bulbs.
- Ideally, plant your bulbs soon after you purchase them.
- Select a site with lots of sun and well-drained soil. Work a few inches of compost in the soil.
- Plant bulbs generously in case some do not sprout. And plant them in random order and spacing for a more natural appearance. If you love groves of daffodils and blanketed landscapes of tulips, be prepared to buy and plant a large quantity of bulbs!
- In general, plant bulbs at a depth of three times the width of the bulb.
- After planting, apply fertilizer low in nitrogen, such as a 9-6-6 formulation. If your soil’s sandy, plant bulbs slightly deeper; in clay soils, slightly shallower.
- Water well after planting. Apply mulch to keep the weeds down and hold in moisture.
- Do you have voles or chipmunks? Consider planting your bulbs in a “cage” fashioned with chicken wire.


Sisyrinchium ~ Blue-eyed Grasses Plant Care Guide ~ Varieties

Sisyrinchium (Blue-eyed Grasses) is a genus of 70-200 species of annual to perennial plants of the iris family, native to the New World.
Several species in the eastern United States are threatened or endangered.
http://en.wikipedia.org/wiki/Sisyrinchium
http://commons.wikimedia.org/wiki/Category:Sisyrinchium

Common Name: blue-eyed grass
Type: Herbaceous perennial
Family: Iridaceae
Native Range: Southeastern United States
Zone: 4 to 9
Height: 1.50 to 2.00 feet
Spread: 0.50 to 1.00 feet
Bloom Time: May to June
Bloom Description: Blue
Sun: Full sun
Water: Medium
Maintenance: Medium
Suggested Use: Ground Cover, Naturalize
Flower: Showy, Good Cut
Garden locations
Culture
Best grown in medium moisture, well-drained soil in full sun. Tolerates light shade. Prefers consistently moist soils that do not dry out, but drainage must be good. Will freely self-seed in optimum growing conditions. Plantings may be sheared back after bloom to avoid any unwanted self-seeding and/or to tidy foliage for remaining part of the growing season. Plants may need to be divided every 2-3 years to keep plantings vigorous.
Noteworthy Characteristics
Though their foliage is grass-like, the blue-eyed grasses belong to the iris family not the grass family. Sisyrinchium angustifolium is noted for its violet-blue flowers and branched flowering stems. It is native to Missouri where it occurs in damp open woods, slopes and along stream banks throughout much of the State. It is a clump-forming perennial that features a tuft of narrow grass-like leaves (to 3/16″ wide) typically growing to 12″ (less frequently to 20″) tall. Clusters of violet-blue flowers (to 1/2″ across), each with 6 pointed tepals and a yellow eye, appear in spring on stalks growing from leaf-like bracts atop usually branched flowering stems which are distinctively flattened. Sisyrinchium campestre, also a Missouri native, features pale blue to white flowers atop unbranched flowering stems. S. angustifolium includes plants formerly classified as S. bermudianum.
Problems
No serious insect or disease problems.
Garden Uses
Best naturalized in informal garden areas such as cottage gardens, woodland gardens, wild gardens or native plant areas. Also effective in border fronts and rock gardens. Also effective as an edger for paths or walkways.
http://www.missouribotanicalgarden.org/PlantFinder/PlantFinderDetails.aspx?kempercode=i870

Blue-Eyed Grass can be a shy, retiring plant at times. They are small perennials, only 10-30 cm (4-12″) tall, with leaves to 3 mm (1/8″) wide. They start opening their eyes in early June and continue to look around all through June. But you have to be a morning person. Sometimes I have gone to photograph those pretty blue eyes in the afternoon only to find that they have already closed their eyes for the day. And just try to find them when their eyes are closed! Their medium green grass-like leaves fade into the background and mingle shyly with all the prairie grasses around them.
Each pretty blue eye sheds a tear when it is finished blooming, in the form of a small round seed capsule filled with tiny black seeds. Perhaps they are tears of happiness or perhaps they are tears of sorrow. We can only speculate. This plant is also known as Star Grass by some people because the flowers are distinctly star shaped. Blue-Eyed Grass is actually not a true grass, but a member of the Iris family, closely related to Blue Flag or Wild Iris (Iris versicolor).
Native Habitat
Blue-Eyed Grass is a native perennial that grows across the prairies and parklands in open meadows. I have seen it growing in a field in northwest Winnipeg along with Prairie Crocus and Three Flowered Avens. John Morgan (Prairie Habitats – see Gardening with Native Prairie Plants) also reported seeing a hillside covered with blooming plants in the Carberry Hills of Manitoba.
http://www.naturenorth.com/spring/flora/begrass/Fbegrass.html

Narrowleaf blue-eyed grass, Narrow-leaf blue-eyed-grass, Bermuda blue-eyed grass, Blue-eyed grass
Iridaceae (Iris Family)
Synonym(s): Sisyrinchium bermudiana, Sisyrinchium graminoides
USDA Symbol: SIAN3
USDA Native Status: L48 (N), CAN (N)
The numerous, narrow, light-green leaves of this perennial form dense, tufted clumps which steadily grow with new foliage during the season. The flattened, leaf-like flowering stems may be up to 18 in. long and bear light-blue, star-shaped flowers a few inches above the leaves. Height is 1-1 1/2 ft. Several delicate, blue or deep blue-violet flowers with yellow centers in 2 broad bracts top a flat stem, generally only 1 flower at a time in bloom; stems taller than the clusters of narrow, sword-shaped leaves near base.
Although the plant is small and has grass-like leaves, the flowers have all the features of the Iris family. The various species are all much alike and separation is based on such characteristics as branching pattern and leaf length. Common Blue-eyed Grass (S. montanum) is also a widespread species, with slightly wider leaves, over 1/4 (6 mm), and unbranched stalks.
PLANT CHARACTERISTICS
Duration: Perennial
Habit: Herb
Size Notes: 1-1.5 feet.
Leaf: Green
Fruit: Brown
Size Class: 1-3 ft.
BLOOM INFORMATION
Bloom Color: Blue
Bloom Time: Mar , Apr , May , Jun , Jul
Native Habitat: Meadows; damp fields; low, open woods
GROWING CONDITIONS
Water Use: Medium
Light Requirement: Sun , Part Shade
Soil Moisture: Moist , Wet
CaCO3 Tolerance: Low
Soil Description: Moist, poor to average soils
Conditions Comments: This short-lived perennial will decline if allowed to dry out. Heavy mulch causes crown rot and rich, organic soils encourage rank, vegetative growth. Plants need to be divided at least every other year.
BENEFIT
Use Medicinal: Amerindians used root tea for diarrhea (in children); plant tea for worms, stomachaches. Several species used as laxatives. (Foster & Duke)
Conspicuous Flowers: yes
Deer Resistant: No
PROPAGATION
Propagation Material: Seeds
Description: Propagate by seed or division. Several dozen divisions can be expected from a mature, healthy specimen.
Seed Collection: Collect seed capsule when they have darkened to brown and become wrinkled.
Commercially Avail: yes
FIND SEED OR PLANTS
Find seed sources for this species at the Native Seed Network.
http://www.wildflower.org/plants/result.php?id_plant=SIAN3

Time lapse Winter Aconite flowering, snow melting ~ Winter Aconite ~ Plant Care Guide
Winter Aconite ~ Plant Care Guide ~ Auntie Dogma’s


May Birth Flower ~ Lily of the Valley

Lily of the Valley is Sweetness and Humility

The History and traditions surrounding the May Birth Flower, the Lily of the Valley is fascinating. There are many myths and legends about the origins of this tradition. It is believed that birthday celebrations originated in the Roman Empire and the origins of birth month flowers, such as the Lily of the Valley, could be said to date back to these times.
The language of flowers developed during the highly conservative period of the Victorian era. The Victorians were strongly restricted by the rules of etiquette when it was considered totally inappropriate to express feelings of love or affection. The “Language of Flowers” therefore evolved when a message was assigned to specific flower such as the Lily of the Valley. A lover could then send flowers which conveyed a hidden romantic meaning.
The hidden message of the Birth Flower, the Lily of the Valley, so favored during the Victorian era is “You’ve Made My Life Complete”.
Birth Month Flowers – Flowers, such as the Lily of the Valley, are always given to celebrate the birth of a new baby and included in wedding flowers or a wedding bouquet. Lily of the Valley is often used in May Day and Cinco de Mayo celebrations.
Lily of the Valley Plant Care Guide ~ click here
The Sweet Smell of Spring, Whenever You Yearn for It

Bitterroot Plant Care Guide

Members of the Lewisia genus are small hardy perennials. They have rosette leaves that carry stiff stems.
Atop of these stems Lewisia has cup shaped flowers of white, pink, purple or red; these come into bloom from spring through to the first months of summer.
One of the common names for Lewisia is Bitterroot.

Lewisia rediviva – Bitterroot by Brewbooks.
Quick Lewisia Growing Guide and Facts
Common Names: Bitterroot, Lewisia: Cantelow’s; Shortsepal; Columbian
Life Cycle: Hardy perennial.
Height: 2 to 12 inches (5 to 30 cm).
Native: Northern America.
Growing Region: Zones 4 to 8.
Flowers: Spring through to early summer.
Flower Details: White, red, pink, purple. Cup-shaped.
Foliage: Rossette. Suuculent. Evergreen. Herbaceous. Rounded. Narrow.
Sow Outside: Surface. Towards the end of autumn or early in winter using fresh seeds. Spacing 2 to 8 inches (5 to 20 cm).
Sow Inside: Germination time: One to two years. Temperature: 50 to 60°F (10 to 16°C) in the light. Mix seeds in a moist growing medium, place in a freezer bag, then stratify by refrigeration for five to six weeks. Once germinated allow to grow for one year. Transplant outdoors in the spring.
Requirements and care: Full sunlight or light shade. Soil pH 5.0 to 8.0. Gritty soil, Moist soil. Can survive in dry soils. Very susceptible to crown rot; overcome this by moving the crowns so that they are about an inch (2.5 cm) above the ground and surround/mulch with gravel. Plants prefer a moist soil, but when watering do not splash plants. Propagate: from rosette runners in the summer.
Miscellaneous: Lewisa rediviva is the state flower of Montana. Bitteroots were ate as a delicacy by some native American tribes including the Shoshone.
How to Grow Bitterroot – Lewisia
Bitteroot can be grown from seeds outdoors by sowing fresh ripe seeds on the surface when available (late autumn/ early winter). They can grow in either sunny or lightly shaded areas of the garden that have a rich, gritty and moist soil. Ideally the pH that Bitterroot grows in will be of pH 5 to 8.
If you first plan to start bitteroot off indoors, be aware that they are quite hard to grow. The seeds should be first imbibed by placing the seeds (within soil) in a black plastic bag, then placing in the fridge for five weeks. Seeds should then be sown out at a temperature of 10 to 15 degrees Celsius; they can take anything from one to two years to germinate. They should be allowed to grow for a further year before transplanting outside.
Small species of Lewisia should be spaced at about 5 cm apart and larger ones up to 20 cm apart. If you require more Lewisia then plant the aerial rosettes that the plant produces in the summer; this is much easier than growing bitterroot from seed.
Caring for Bitterroot – Lewisia plants
Once growing Bitterroot and other Lewisia are quite difficult to look after. Plants are susceptible to crown rot, so set the crowns about 3 cm above the soil, and fill the gap between the crown and soil with stone chippings.
It is important to protect the bitterroot plants from overhead water, so try to grow under a crag in the rock garden. Additionally it is important to make sure that they have ab adequate supply of water, so water from below to keep the soil around Lewisia moist.
***************
See Also …….
ASPCA ~Bitter Root ~ Veterinary Guide
How to Grow and Care for Bitter Root Plants
Bitterroot (Lewisia rediviva)
BITTER ROOT ~Lewisia rediviva Pursh PDF
Native Plant Database
Echium vulgare “Vipers Bugloss” Plant Care guide ~ Echium Varieties

Echium vulgare is a rather exotic native plant which makes a rosette of oblong hairy leaves from which arises a stout flowering spike with blue conical flowers up its length. Each flower has protruding red stamens.
Used in the border or as part of wildlife friendly planting schemes, the buds of start off pink at first, the flowers turn the most exquisite shades of intense blue and as the flowers fade they become tinged with crimson.
Echium vulgare is a valuable plant and is exotic enough to earn a place in a flower border or used it as near to your allotment to ensure pollination. If you don’t want plants that honeybees simply visit, but want to select plants that honeybees clearly love, choose Echium for your garden.
Viper’s bugloss is one of, if not THE very best plant to attract bees to your garden. Along with Borage and Phacelia, the plant is much loved by almost all bee species, especially bumblebees.
For months this plant is a stable source of nectar:
- The plant repeat blooms throughout the summer into autumn, providing nectar for bees for overwintering.
- Unlike many flowers. Echium has a most unusual feature. The nectar inside the flower is protected inside the flower, from vaporization (when it’s hot) or being flushing away (when it rains).
- This plant produces nectar throughout the day unlike most plants which produce nectar for a short period of time. If the bees have a good access to Echium they can collect between 12-20 lbs of nectar a day.
- The plant continues to bloom throughout drought periods. The concentration of sugars in the nectar varies, from 22.6 to 48.3% depending on the quality of the soil, and not on the amount of rain.
Sowing: Sow in March to May or in August to September
Sow March-May for flowers June-September, or sow August-September to flower May-July the following year. The seed should be sown directly outdoors where it is to flower in spring or autumn. They prefer well drained soil in full sun or part shade. The seed can also be sown indoors, but direct sowing is preferable, as they have a long taproot which can be damaged when transplanting. Make two or three successive sowings for continuous flowers.
Sowing Direct.
Prepare the area where they are to grow. Removing any weeds or stones and rake to a fine tilth. Sow thinly, 6mm (¼in) deep in drills 30cm (12in) apart. Sow the seed sparingly or they will choke out other seedlings. Water ground regularly until the seedlings are established, especially in dry periods. Optimum germination temperature: 60 to 65°F (15 to 18°C).
If sowing more than one annual in the same bed, consider marking the sowing areas with a ring of sand and a label. The seedlings will appear in rows approx 6 to 8 weeks after planting and can be easily told from nearby weed seedlings.
Prick out superfluous seedlings rigorously, so that the plants are at least 38cm (18in) apart. They will then have enough space to spread satisfactorily.
Cultivation:
Plant in a dry, sunny position in well-drained or sandy soil. Deadhead to prolong flowering and encourage new flower buds. Plants will reseed themselves if a few heads are left in the garden to mature. Leave a few plants to die down to self seed or collect seed for next year, others can be pulled up and composted.
Caution!
This striking species is best viewed and not touched. The sharp spines, which cover the plant, are a powerful deterrent and can be a skin irritant; becoming lodged in the skin much like those of a cactus. If you are tempted by the Viper, please use gloves when handling the plant!
Plant Uses:
Flowers Borders and Beds, Patio/Container Plants, Cut Flower, Wildlife and wildflower meadows. Bees and Honey making. Butterfly gardens, Drought Tolerant.
Origin:
Echium vulgare is a very attractive European native, often found on grassy and undisturbed situations. It prefers a well-drained chalky soil and is often seen on chalk and limestone downs, by the coast on cliffs, sand dunes and shingle.
Vipers Bugloss has sadly declined somewhat in frequency, due to agricultural intensification, reclamation and the development of neglected ground.
Historical Uses:
The popular name records its historic use as a cure for snake bites.
Culpeper’s Complete Herbal (circa 17th century) describes Viper’s as follows: “It is a most gallant herb of the Sun; it is a pity it is no more in use than it is. It is an especial remedy against the biting of the Viper, and all other venomous beasts, or serpents; as also against poison, or poisonous herbs.
Discorides and others say, That whosoever shall take of the herb or root before they be bitten, they shall not be hurt by the poison of any serpent.”
Nomenclature:
Echium vulgare belongs to the Boraginacea family. It is known as Viper’s Bugloss.
The genus Echium is named from the Greek echis meaning “a viper,” the flowers apparently appearing to represent a viper’s head.
The species name vulgare means ‘common’, a common wildflower,
The name bugloss is of Greek origin, from a word signifying an ox’s tongue, and alluding to the roughness and shape of the plant’s leaves. The viper part of the name may derive from the spotted stem, said to recall marks on a snake, or an imagined resemblance between the dead flower-head and the head of a snake.
source ~ seedaholics.com
**********************
related links ………
Echium Vulgare ~Viper’s Bugloss ~ ASPCA Animal Warning
Growing an Echium plant
VIPER’S BUGLOSS and related species PDF
Viper’s Bugloss (Echium Vulgare) Seed
How to Winterize Viper’s Bugloss
Fact Sheet: PLANT DIARY: Echium wildpretii
Pride of Madeira (Echium candicans)
Plants in the Echium genus
- Echium albicans
- Echium brevirame
- Echium candicans
- Echium creticum
- Echium gentianoides
- Echium italicum
- Echium pininana
- Echium plantagineum
- Echium sabulicola
- Echium simplex
- Echium tuberculatum
- Echium virescens
- Echium webbii
- Echium wildpretii

Echium Webbii


Delphinium ~ Larkspur Plant Care Guide and Varieties
Delphinium

Delphinium is a stately, elegant perennial that is a standard in English cottage gardens. Mounds of dark green, glossy foliage are adorned with huge spikes of showy, spurred flowers in early summer. Another common name is larkspur, although this name usually refers to annual varieties.
About This Plant
Delphiniums thrive in regions with relatively cool and moist summers, and often struggle in hot, dry summer weather. However, some new varieties are more tolerant of heat.
Delphiniums are available in a range of sizes, from dwarf varieties less than 2 feet tall to those with towering, 6-foot blooms. Flower color includes blue, red, white, and yellow; however, the rich, clear blues are especially prized by many gardeners. The plants bloom in late spring to early summer, and the flowers are suitable for cutting.
Special Features
Good for cut flowers
Site Selection
Select a site with full sun to light shade and well-drained soil. Choose an area protected from strong winds to keep tall, top-heavy varieties from blowing over.
Planting Instructions
Plant in spring, spacing plants 1 to 3 feet apart, depending on the variety. Prepare the garden bed by using a garden fork or tiller to loosen the soil to a depth of 12 to 15 inches, then mix in a 2- to 4-inch layer of compost. Dig a hole twice the diameter of the pot the plant is in. Carefully remove the plant from its container and place it in the hole so the top of the root ball is level with the soil surface. Carefully fill in around the root ball and firm the soil gently. Water thoroughly.
Care
Apply a thin layer of compost each spring, followed by a 2-inch layer of mulch to retain moisture and control weeds. Water plants during the summer if rainfall is less than 1 inch per week. Soil should never dry out. Stake tall varieties to prevent hollow flower stalks from snapping in the wind, and deadhead after flowering to encourage rebloom. After the first killing frost, cut stems back to an inch or two above soil line. Divide plants every three to four years as new growth begins in the spring, lifting plants and dividing them into clumps.
*************************
How to Care for Larkspur
Overview
Include larkspur in your flower garden and the tall, stately spikes will produce blooms in shades of purple, blue, rose, pink and white all summer long. Most strains are tall enough to be a backdrop for other flowers, and they’re especially beautiful planted along a wall or a garden fence. Small varieties are compact enough to make a colorful border plant. Clip a few for a fresh floral arrangement or dry them for a cheery winter bouquet.
Step 1
Stake larkspur to prevent it from breaking in the event of a strong wind. Some larkspurs can grow to a height of 5 feet or more, and although the stalks are sturdy, the blooms are heavy and can cause the plant to lean and break. The easiest way to stake a tall plant like larkspur is to insert a wooden stake into the soil about 3 inches from the larkspur’s stem. Tie the stem to the stake loosely with soft twine or a strip of pantyhose.
Step 2
Water larkspur twice a week, and more during dry periods, and give it an all purpose fertilizer every other week. Just before the larkspur begins to bloom, give it a high potassium fertilizer. Check the instructions on the package label for amounts.
Step 3
Cut the blooms for cut flower arrangements just before they reach full bloom. Use garden shears or sturdy scissors to cut long stems to arrange in a vase. Don’t worry about removing too much stem from the plant, as pruning will encourage more blooms. Deadheading any spent blossoms will allow the plant’s energy to go into developing new larkspur flowers. To deadhead, just clip the stem below the spent blossom, or pinch it off with your fingers.
Step 4
Watch the larkspur for signs of problems. Although larkspur isn’t prone to insect problems, it can develop mildew, which is a type of fungus that can be recognized by white or black spots on either side of the leaves, or by a powdery, stringy substance. If the problem persists, the leaves will become distorted, or will turn brown or yellow and will eventually fall off. Treat the infected plant immediately with a fungicide, following the directions on the label carefully.To avoid mildew, make sure the plant has good air circulation and adequate sunlight.
******************

See Also ……
Native Plant Database with list of 31 wildflower Larkspur Varieties
How To Grow Larkspur Plants In The Garden
Larkspur @ the flower experts
Delphinium ~ larkspur @ botany.com
Delphinium ~ Larkspur Plant Profile @ USDA Plant database
Marsh Marigold Plant Care Guide
Marsh Marigold Plant Care Guide
By Becca Badgett

Those living in mountainous areas of the upper southeast and lower Midwestern states may notice perky, yellow, buttercup-like blossoms springing up from April to June in moist woodlands and boggy areas. Likely you are seeing marsh marigolds, which may lead you to ask, exactly what are marsh marigolds?
What Are Marsh Marigolds?
Not related to traditional garden marigolds, the answer is Caltha cowlsip, or in botanical terms, Caltha palustris, a member of the Ranunculaceae family. More detail to what are marsh marigolds includes the fact that they are herbaceous perennial wildflowers or herbs.
Not a traditional herb, however, as leaves and buds of growing marsh marigold plants are poisonous unless they are cooked with several coverings of water. Old wives tales say they add the yellow color to butter, as they are a favorite of grazing cows.
Caltha cowslip is a 1 to 2 foot perennial with a mounding habit and is a succulent. The flower color on growing marsh marigold plants is on sepals, as the plant has no petals. Sepals are borne on waxy and attractive green foliage, which may be heart shaped, kidney shaped or rounded. A smaller species, the floating marsh marigold (C. natans), grows in more northern areas and has sepals of white or pink. This species has a hollow stem which floats on water.
These plants make great additions to the moist garden, and as a bonus Caltha cowslip attracts butterflies and hummingbirds.
How and Where to Grow Marsh Marigolds
Growing marsh marigold plants in moist woodlands and near ponds is simple and marsh marigold care is easy to nonexistent. The Caltha cowslip basically takes care of itself and is suited only to moist areas with well draining soil. In fact, any moist or boggy area is appropriate for growing marsh marigolds. When you are growing marsh marigold plants, don’t let the soil dry out. They will survive drought conditions, but go dormant and lose their leaves.
Seeds for propagation of the Caltha cowslip form near the end of the bloom period. These can be collected and should be planted when ripe.
Now that you know the ease of marsh marigold care and where to grow marsh marigolds, try adding the Caltha cowslip to a moist area in your woodland or natural area.

************************
See Also …..
Native Plant Database
Marsh Marigold ~ National Gardening Club
National Pond Service ~ Marsh Marigold
Painted Trillium Planting Guide and Types
Trillium Planting

Overview
Trillium flowers bloom during the late spring and summer months. These three-petaled flowers come in hues of white, yellow, crimson or purple. Wildflowers native to North America, trillium makes a rewarding shade plant but takes years to establish and thrive. Plant either from seed or from rhizome in the late summer to early fall.
Growing Environment
Trilliums prefer a rich, moist soil with lots of organic material. These flowers grow well in shady spots and can grow beneath tree canopies. They do best with a pH near neutral or slightly acidic.
Geography
Different types of trillium grow from USDA plant hardiness zones 3 to 8. White trillium (Trillium grandiflorum) grows naturally throughout the northeastern United States and as far south as Georgia, though this flower is endangered in Maine and nearly so in New York. The purple toadshade trillium (Trillium underwoodii) grows in the southeastern United States as far south as Florida.
Planting From Seed
Trillium planted from seed can take up to two years to germinate, according to the Alabama Cooperative Extension Service. Collect seed from trillium flowers in the summer months. Then prepare the ground for planting by digging up the soil in your chosen area, breaking apart soil clumps and removing rocks and other debris from the seed bed. Rake the soil back into an even layer once you’ve dug up and aerated the soil. Dig furrows 1/4- to 1/2-inch deep. Then sow trillium seeds in the furrow, spacing them 1 to 2 inches apart. Cover over the soil and water the seed bed thoroughly. Continue to water it when the soil becomes dry until the seeds germinate.
Planting From Rhizome
Prepare the soil in the same manner when planting trillium from rhizomes. Then dig one hole for each rhizome that’s twice as wide as the rhizome and 2 inches deeper. Space the holes 10 inches apart. Place the rhizome in the hole with the pointy eye facing up. Cover the rhizome with 2 inches of soil. Water the ground until the soil becomes saturated then continue to water during dry periods.
Tips
Trillium patches can take up to 17 years to get established but may live up to 70 years, notes Skidmore College. Amending the soil with lots of compost will help new trillium get established. White-tailed deer graze on white trillium flowers, so avoid planting this flower if your area has an invasive deer population.
Types of Trillium Flowers
The Trillium genus belongs in the lily plant family (Liliaceae) and contains numerous perennials native to the United States. Most trillium species bloom during the spring and early summer. If you would like to grow trillium flowers, select a variety according to your hardiness zone, the plant’s mature size, flower color and intended use.
Green Trillium
Green trillium (Trillium viride) performs well in hardiness zones 5 to 8. This trillium species reaches up to 18 inches in height and spread. Green or yellow-green flowers appear in April and May. Also called the wood trillium, this plant features leafless stems and deep green leaves. The foliage generally dies by the middle of summer. Green trilliums like humus, well-drained soils in partial to full shade positions. Gardeners often use the green trillium in wildflower gardens.
Red Trillium
The red trillium (Trillium erectum), sometimes called the stinking-Benjamin, features diamond-shaped green leaves and stems that range from 6 to 18 inches tall. Solitary, deep red flowers with backward curving petals bloom from April through June. These foul-smelling flowers wither in two or three weeks, giving way to red fruits that attract birds. This perennial typically performs well in hardiness zones 4 to 8. This plant prefers acidic, humus soils in partial shade to full sun locations. Red trillium plants perform well in rich, moist woodland areas.
Pacific Trillium
The pacific trillium (Trillium ovatum ) ranges from 8 to 20 inches in height. This perennial features broad green leaves and long, naked stalks. Flowers display from February through June, featuring white blossoms that fade to pink within a week. This trillium variety also is called the western wakerobin because the flowers bloom around the time that robins appear in the spring. This trillium species prefers cool soils in shady sites. Pacific trillium plants work well planted along streams and moist slopes in hardiness zones 5 to 8.
Nodding Trillium
Nodding trillium plants (Trillium cernuum), also called whip-poor-will flowers, bear large green leaves and arching stems that reach up to 18 inches tall. Nodding, white flowers with pink anthers bloom in May, followed by purple berries that ripen to red. These inedible berries contain toxic principles. Winter hardy in zones 2 to 9, this type of trillium requires moldy, rich soils in shady positions. Gardeners often plant nodding trillium in damp woodland margins.
Painted Trillium
The painted trillium (Trillium undulatum) features a thin, arching stalk that reaches up to 16 inches long. This trillium species bears large, bluish-green leaves and white flowers with pink or purple markings. These blossoms appear from April through June, followed by red berries in the early autumn. Winter hardy to zone 4, the painted trillium tolerates various lighting conditions but prefers acidic, sandy soils. The painted trillium works well planted in moist woodland areas.
Slender Trillium
Slender trillium plants (Trillium gracile), sometimes called graceful trilliums, need moist, acidic soils in shady, undisturbed locations. Winter hardy to zone 6, this trillium variety bears mottled, green leaves and flowers that appear in April. The blossoms emerge a maroon color but turn attractive, yellowish-green shades with age. Mature plants range from 8 to 12 inches in height. Gardeners often plant the slender trillium in woodland gardens.
**************
See also ….
Painted Trillium (Trillium undulatum) ~ By Larry Stritch
Trillium undulatum Willd. ~ painted trillium
Trillium undulatum – Willd.


Phlox Plant Care Guide
Phlox

Phlox in bloom are a sight to behold, with masses of small, star-shaped, colorful flowers blanketing the plants. There are several types, the most common of which are spring-blooming creeping phlox and summer-blooming tall phlox.
About This Plant
There is a type of phlox suitable for almost any garden situation. Use spring-blooming creeping phlox as a ground cover in rock gardens and in woodland plantings. Tall garden phlox brighten the back of the border with their exuberant early summer flowers. Tall phlox are susceptible to powdery mildew, especially in regions with hot, humid summers, so choose resistant varieties.
Special Features
Easy care/low maintenance
Multiplies readily
Fragrant
Good for cut flowers
Attracts hummingbirds
Attracts butterflies
Site Selection
Select a site with moist, well-drained soil. Some types prefer full sun while other types thrive in shade.
Planting Instructions
Plant in spring, spacing plants 1 to 2 feet apart, depending on the variety. Prepare the garden bed by using a garden fork or tiller to loosen the soil to a depth of 12 to 15 inches, then mix in a 2- to 4-inch layer of compost. Dig a hole twice the diameter of the pot the plant is in. Carefully remove the plant from its container and place it in the hole so the top of the root ball is level with the soil surface. Carefully fill in around the root ball and firm the soil gently. Water thoroughly.
Care
Apply a thin layer of compost each spring, followed by a 2-inch layer of mulch to retain moisture and control weeds. Water plants during the summer if rainfall is less than 1 inch per week. As flowers fade, cut back old flower stems to encourage rebloom. Divide tall garden phlox every 2 to 3 years to promote vigor and minimize disease problems. After the first killing frost, cut stems on tall phlox back to an inch or two above soil line.
*************


Anemone ~ Windflower Plant Care Guide

Anemones, also known as windflowers, are a diverse group, with various species blooming in spring and fall. Some have fibrous roots and are found in the perennials section of nurseries and garden centers. Others grow from tubers that are sold and planted in the fall along with spring-flowering bulbs like tulips.
About This Plant
Spring blooming anemones are low growing plants that are good choices for woodland and rock gardens. While most of them grow from creeping rhizomes, Grecian windflower (Anemone blanda) and poppy anemone (A. coronaria) grow from tubers. Plant these early bloomers in the fall; Grecian windflowers are hardy in zones 4-7, while poppy anemones thrive in zones 6-9 and are also popular for forcing.
Tall growing fall anemones add color to borders and woodland gardens from late summer to late fall in shades of pink and white. These Asian natives bear large, cup-shaped blossoms on graceful stems that sway above clumps of dark green, maple-like leaves.
All anemones are poisonous if ingested.
Special Features
Wood anemone (Anemone nemorosa) This species will often naturalize in the shade of deciduous trees, where its deep green leaves provide a backdrop to its pure white, single, star-shaped flowers in early spring. Pink and blue cultivars are also available. Growing 6-8 inches tall, it prefers rich, moist but well-drained, acid soil; roots will rot if the soil is too soggy. Wood anemone goes dormant in early summer as the trees leaf out. Sometimes it’s offered in the fall as a dormant rhizome. Hardy in zones 3-9.
Snowdrop anemone (Anemone sylvestris) Another spring bloomer that naturalizes well, this species has fragrant, single, slightly nodding, 1-2 inch wide flowers on 12-18 inch plants. It prefers the same growing conditions as the wood anemone. Hardy in zones 4-9.
Grapeleaf Anemone (Anemone tomentosa ‘Robustissima’) Growing about 3 feet tall, this anemone will spread but is not invasive. The hardiest of the fall bloomers, it will grow in zones 3-9. The flowers are silvery pink and come into bloom in early fall, carrying on for several weeks.
Hybrid or Japanese anemone (Amemone x hybrida) This Asian native bears large, single or double, cup-shaped blossoms whose satiny petals surround a contrasting green and gold central button. Commonly available cultivars include the elegant, single-flowered, white variety ‘Honorine Jobert’, and semi-double, pink ‘Queen Charlotte’. Its flowers are borne on 3-4 foot tall stems in mid fall. Hardy in zones 5-9.
Chinese anemone (Anemone hupehensis) Similar to the hybrid anemones, but more compact, these are 2-3 feet tall in bloom. Popular cultivars include deep rose-pink, semi-double ‘Prince Henry’ and ‘September Charm’ with single, rose-pink flowers in late summer to early fall. Hardy in zones 4-9.
Site Selection
Spring blooming anemones do best in part shade. Fall bloomers thrive in full sun to part shade. All appreciate soil that is moist, but well-drained- never soggy and on the acid side.
Planting Instructions
Container grown plants can be set out throughout the growing season, but spring is preferred for fall bloomers. Divide the spring bloomers in midsummer or early fall. Space wood anemones 10 inches apart, snowdrop anemones 12-24 inches apart and fall bloomers 18 inches apart. Prepare the garden bed by using a garden fork or tiller to loosen the soil to a depth of 12 to 15 inches, then mix in a 2- to 4-inch layer of compost. Dig a hole twice the diameter of the pot the plant is in. Carefully remove the plant from its container and place it in the hole so the top of the root ball is level with the soil surface. Carefully fill in around the root ball and firm the soil gently. Water thoroughly.
Care
Divide or move plants in the garden only in the spring. Fall anemones may be slow to establish, but once they are settled in they have a tendency to spread, as do the spring bloomers. Deadheading won’t prolong bloom, but will make plants look neater.


Grape Hyacinth Planting Guide
Garden Pearls

Like clusters of tiny white and blue pearls, grape hyacinths are ideally suited for decorating the edges of gardens, containers and paths. Think of them as affordable jewelry for your landscaping. We’ve heard these little flowers compared with the delicate work found in Faberge eggs and seen up close, the resemblance is understandable. For those inclined to snip a few small flowers for a bedside bud vase, you’ll want to make sure these petite treasures are available. Many even offer a light, grapey scent to confirm that winter has past and spring really has arrived. And blues – well, these are some of the best true blues in the gardening world. Combine their color, cost and constitution and you’ll agree that these belong in every garden.
Outdoor Beds
- Find a location where the soil drains well. If there are still water puddles 5-6 hours after a hard rain, scout out another site. Or amend the soil with the addition of organic material to raise the level 2-3″ to improve the drainage. Peat moss, compost, ground bark or decomposed manure all work well and are widely available. While grape hyacinths aren’t fussy about soil, they will not survive in soggy soil or standing water.
- Site your grape hyacinths where they will get good light – full or three quarter day sun will produce the best blooms.
- Dig holes and plant the bulbs 3-4” deep and 3” apart. The bulbs are round, with small points on the sides that should be placed facing up.
- After planting, water well to settle the soil around the bulbs. Roots and foliage form in the fall. Flowers form in the spring.
- When in bloom, feel free to cut grape hyacinth flowers for tiny, perfect bouquets. This will not hurt your plants.
- After blooming has finished for the season leave the foliage in place; don’t cut it off. The leaves will gather sunlight, create food through photosynthesis and strengthen the bulb for the future. Water as needed during active growth periods; about 1″ of moisture per week is a good estimate.
- Late in the spring the leaves will yellow and die back as the plant slips into dormancy. The foliage may be removed at this point. Your bulbs will rest for a few months before beginning the next growing cycle.
- Grape hyacinths will self seed and spread over time. Most gardeners love this tendency to naturalize. Eventually crowding may occur and flowering activity may decline. If this happens, dig up the bulbs and separate them. Distribute them around your garden or share your bounty with friends. Replant promptly. These plants typically perform beautifully for many years.
Pots, Barrels, Tubs & Urns
- Use tall or shallow containers; grape hyacinths work well when mixed with other petite flowers, like pansies or miniature daffodils, or when tucked around the ankles of taller plants.
- Fill your containers with good quality, well-drained soil. Almost any commercially available potting medium will work fine. Make sure there are adequate drainage holes; grape hyacinths must never sit in waterlogged soil or they will rot.
- Site your grape hyacinths where they will get good light – full or three quarter day sun will produce the best blooms.
- Dig holes and plant the bulbs 3-4” deep and 3” apart. The bulbs are round, with small points on the sides that should be placed facing up.
- After planting, water well to settle the soil around the bulbs. Roots and foliage form in the fall. Flowers form in the spring.
- When in bloom, feel free to cut grape hyacinth flowers for tiny, perfect bouquets. This will not hurt your plants.
- After blooming has finished for the season leave the foliage in place; don’t cut it off. The leaves will gather sunlight, create food through photosynthesis and strengthen the bulb for the future. Water as needed during active growth periods; about 1″ of moisture per week is a good estimate
- Late in the spring the leaves will yellow and die back as the plant slips into dormancy. The foliage may be removed at this point. Your bulbs will rest for a few months before beginning the next growing cycle.
Indoor Forcing
- Grape hyacinths can be forced into bloom indoors in winter to add a splash of color and light fragrance to your home. They are easy to force and a good choice for beginners. You will need a cool place to chill the bulbs. An unused refrigerator or a basement where the temperature is 40-50 degrees Fahrenheit will work well. (Do not attempt to force bulbs by placing pots in the refrigerator where you keep fruits and vegetables. Produce gives off ethylene gas as it ripens and this retards bulb growth.)
- Plant the bulbs 3-4″ deep and 1-2″ apart and place the containers in a cool site (see step 1 above) for 10-12 weeks. Check occasionally to confirm that the soil hasn’t dried out entirely – lightly moist is best. During this time the bulbs will grow a significant network of roots that will eventually peek out the drainage hole in the pot’s bottom. This is a sign that your bulbs are ready to begin the flowering process.
- Move your pots to a light area where the temperature is warmer. Grape hyacinth blossoms (and those of all other forced bulbs) will last longer if moved to a room that is a bit cool. Hot, dry air pushes the bulbs to flower quickly, but the show also passes fast. Plant several pots and bring them into the warmth in stages, a few days apart, to extend the flower display for a number of weeks.
*************
Muscari
If you’re looking for hardy, no-care, “Plant and Forget” spring flowering bulbs, look no further – load up on Muscari. These bulbs are so winter hardy and easy to grow that no garden should be without them.
There are about 30 different species of Muscari, but only 4 or 5 are widely available. Best known are the Muscari armeniacum or, as they are more commonly known, Grape Hyacinths. They are so named because their clusters of small, bell-shaped, cobalt-blue flowers look like clusters of upside-down grapes.
There is a famous planting of them at the Keukenhof Gardens in Holland which is known as the Blue River.  This is a dense planting of Muscari armeniacum that winds through the Gardens, past trees, shrubs, and other spring flowers. Year after year, this is one of the most photographed scenes in this park. Try planting a large drift of Muscari armeniacum in your garden for a similar effect.
An additional benefit is that all Muscari have a lovely fragrance. The more you plant, the more fragrance you get.
Other, cultivated varieties of Muscari armeniacum come in different shades of blue, and one variety comes in white. Different species of Muscari provide additional variety in terms of colour and form: Muscari azureum has a somewhat more open and less “grapey” look, Muscari latifolium is two-toned: light and dark blue, and Muscari plumosum is feathery and mauve in colour.
In terms of their care:
- all species’ bulbs should be planted at least 3″ (8 cm) deep, in a location where the water can’t settle in winter
- plant bulbs in zones 3 – 9, except for M. latifolium which prefers zones 2 to 5
All species will naturalize extremely easily (i.e. come back year after year and gradually multiply); that is, unless you plant them in completely sunless or swamp like conditions!
Muscari are all-round flowers: they are excellent as cut flowers, when planted in rock gardens, beds, borders, under shrubs, and trees, and can be used for indoor forcing. The following chart shows some of the species and varieties available from nurseries, and from mail order and on-line catalogs. To indicate that they are fragranced, I have put an asterisk (*) after the name of each variety.
Chart can be found here, highly recommend viewing, there are some really pretty varieties 🙂
like this one ~ M. plumosum
***************


Recent Comments